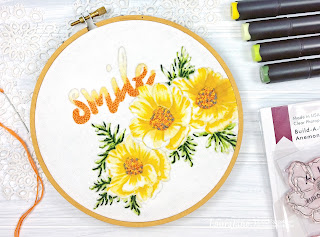
Hello Everyone!
After pondering over a project to feature for the final step of Level 3 for AECP , I ventured to teach a card and stitching combo, using Mini sets from Altenew.
So many, if not ALL of the sets, mini and larger, have SO much stitching potential! There just isn't enough time to get my ideas down on paper, let alone in a hoop! I have found the dreaming and planning of them to be almost as enjoyable though!
Here is a photo of my finished card and hoop using the Capture Moments set.
Supplies List:
- Capture Moments stamp set
- Crisp Inks
- Artist Markers
- A2 size Card stock
- A2 size Cardbase
- Acrylic Blocks
- Tape Runner
- Fabric
- Hoop
- Embroidery Floss that coordinates with the markers chosen....this is where Marker Re-fill dyed floss comes in handy:))
- needle
- Pattern Paper
- Halftone Circles Nesting Dies
- Die Cutting machine
- Glue
- Stamps for personalizing the back of the hoop
- scissors
Instructions:
- stamp the camera image from Capture Moments onto A2 size Cardstock with Rocky Shores
- add the sentiment, stamping happy with a shade darker....Mocha
- color quickly with the Artist Markers
- Repeat the first three steps onto the Fabric ...changing the color and position of the sentiment if desired
- Place the stamped and colored fabric in a hoop and begin stitching
- Simple stitch Suggestions
- Satin
- Wagon Wheel Rose
- French Knot
- Seed Stitch
- Back Stitch
- Split Stitch
After stitching is complete:
- take the fabric out of the hoop
- using the outside of the hoop as a template, trim fabric down with scissors
- color outside hoop ring with Artist Markers
- place the finished stitched project back into the colored hoop, make sure fabric front is nice and tight, no wrinkles
- flip hoop over and glue the raw edges of fabric onto the backside of the hoop, being careful not to get glue onto the stitched area
- cut the largest of the Halftone Circles Nesting Dies from coordinating paper
- add some stamping to the cut circle..don't forget to add you name:))
- glue paper circle to the back of the hoop
Finish the card:
- add a few finishing touches to the card front..I added a pop of color on the edge with marker and repeat stamped words around the camera after cutting a simple mask
- using the tape runner, adhere to the card base
Now, present your handmade gift and card to someone you love:))
I am so pleased to have reached this level of the Altenew Educator Certification Program! Both Virginia and Nicole have been gracious and encouraging along the way. Thank you!
Check out these posts if you like my 'Card to Hoop' projects!
Click the caption below each photo to betaken to original post |
| Guest Post for Altenew Card Blog |
 |
| Refresh Your Alcohol Markers |
 |
| Build-A-Flower: Peruvian Lily |
Recap of just my Hoop Art :)
Click the caption below each photo to betaken to original post
 |
| Altenew July 2018 Stamp/Die Release |
 |
| Altenew Build-A-Flower: Flourishing Zinnia |
 |
| Build-A-Flower: Anemone Coronaria |
Thanks for stopping by. Hope your weekend is Blessed!
****I am part of Altenew's affiliate program. Which means I earn a small commission at no additional cost to you every time you click through and purchase product(s) linked in this post. Thank you for your support!


1 comment:
Wow! Love this!!
Post a Comment