Hello Cardmaking friends!
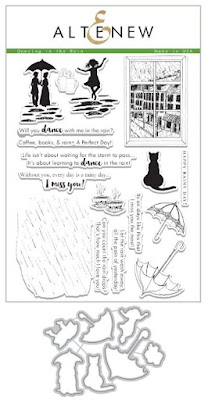
I have a fun post today sharing 4 cards created using the Dancing In The Rain Stamp & Die Bundle from Altenew. This stamp and die bundle is very different from all the flowery stamps that I usually create with..so I'm stretching out of my comfort zone with these.
Here is a look at the
This first card took several tries to work out .. creating a Mandala using the large umbrella image. What do you think?

The Wreath Builder Template from GinaKDesigns came in handy for stamping an almost perfect mandala:)) and a die cut umbrella mask was just the ticket for the slight overlap on the one side of each one.
These are the inks I ended up using to stamp the umbrellas:
*Hydrangea
*Puffy Heart
*Heartbeat
*Snapdragon
*Maple Yellow
*Grass Field
*Volcano Lake
*Ocean Waves
After stamping each umbrella in the 8 colors of the rainbow onto a 4x5.25 piece of 110lb cardstock, I went back with Artist Markers to quickly color the underside of each one. Not all the Crisp Inks have the coordinating markers, but I made due with what is available.
*R 820 Deep Iris
*R 603 Puffy Heart
*R 206 Crimson
*Y 514 Orange Cream
*Y 205 Warm Sunshine
*G 804 Bamboo
*B 714 Volcano Lake
*B 002 Caribbean Sky
TG 02 Limestone for a kiss of shadow
*R 603 Puffy Heart
*R 206 Crimson
*Y 514 Orange Cream
*Y 205 Warm Sunshine
*G 804 Bamboo
*B 714 Volcano Lake
*B 002 Caribbean Sky
TG 02 Limestone for a kiss of shadow
A fine Liner pen is all it took to add to each handle for more definition.

So now that the Mandala was completed, all I had to do was:

So now that the Mandala was completed, all I had to do was:
- Stamped the girl and puddles with Persian Blue in the middle of the mandala
- Stamp the dancing girl and smaller umbrella with my FAVORITE black ink...Obsidian Pigment Ink
- Die cut them out
- Cut a second layer of girl and umbrella from Silver cardstock (for that silver lining)
- Color small umbrella with: Y 204 Mango Smoothie and Y 608 Autumn Blaze
- Carefully stamp the sentiment with the rainbow colors and DANCE in black onto a white strip of cardstock using the MISTI tool
- Matte the whole card front onto an A2 cardbase with the edges embossed with Antique SILVER
- Finished by adding a thin strip of silver underneath the sentiment strip

*******
Moving on to a very simple card for the next one:

To make this card:
- On an A2 cardbase, I repeat stamped the Rain image three times using Crisp Inks:
*Caribbean Sky
*Ocean Waves
*Turquoise
*Turquoise
- Then I scored a single horizontal line at the end of where the rain was falling.
- Scored more lines to the right as if to make a stone wall with bricks...(this is very difficult to see in teh photos)
- Stamped the sentiment below the horizontal line using Ocean Waves and Persian Blue
- Die cut the cat silhouette from white cards stock
- Colored with Artist markers:
*Y 612 Caramel Toffee
*TG 02 Limestone
*TG 05 Industrial Diamond
*WG 07 Lava Rock
*TG 05 Industrial Diamond
*WG 07 Lava Rock
- Glued the cat in to place
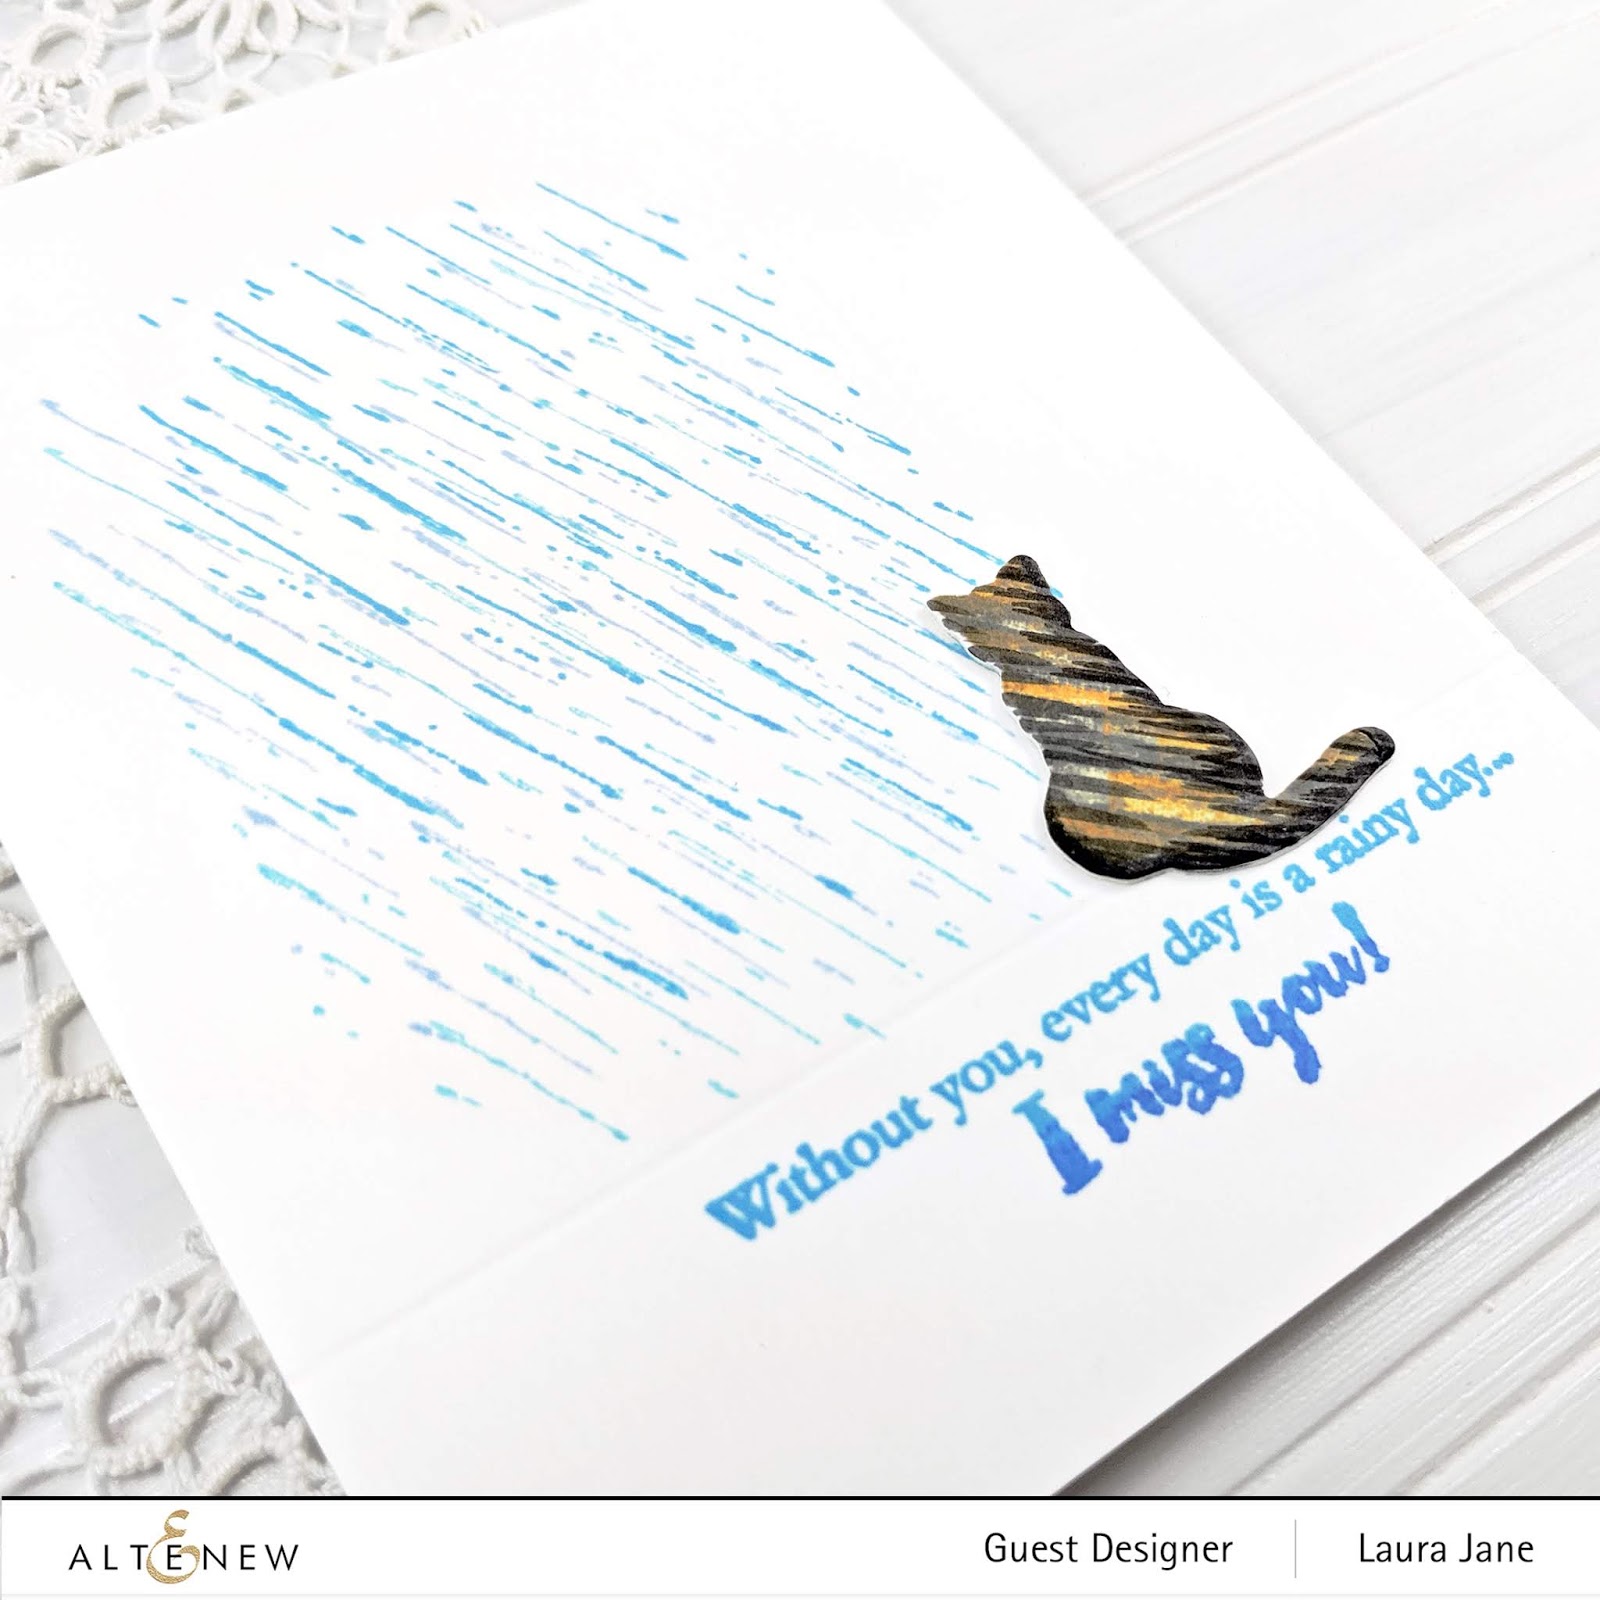
If you look close enough the score line can be seen in the photo below.

*******
I enjoyed some scene building for this next card:

- Stamped some foliage in Turquoise and Persian Blue onto a white A2 cardbase
- Trimmed pattern paper to 3.5'x5" and layered it onto the stamped cardbase
- I stamped the Window image from Dancing In The Rain with the Obsidian Pigment Ink and framed it with the largest of the Fine Frames Rectangles Die.
- Added more floral texture with the Antique Engravings Cover Die
- Cut several cats out with the dies from White CS..layering/glueing them together to give more dimension...flipping one over to so the tail is going the other way:)
- Stamp the tea cups with Turquoise and Persian Blue and cutting them out with the coordinating die
- Tuck them in between the two cats on the window seat
- stamp the sentiment onto a banner strip with the Obsidian Pigment Ink and place it under the cats


*******
And for the final card I stamped a background for the dear couple under the umbrella.

Using these Crisp Inks:
*Hydrangea
*Puffy Heart
*Maple Yellow
*Grass Field
*Volcano Lake
*Ocean Waves
- I stamped several of the smaller Umbrellas and Teacups onto an A2 cardbase
- Cut masks for the Teacups and put them into place
- Heat embossed the Raindrops image over the top with Antique SILVER EP, remove masks
- Carefully remove unwanted powder from the umbrellas with a tiny brush before heat setting the Silver
- Sliver Heat emboss the couple image in the center
- Stamp the Couple with Ocean Waves and Turquoise on a separate piece of white CS,use the die to cut them out.
- Smoosh Turquoise onto a white sentiment strip, allow to dry
- Stamp sentiment with Obsidian Pigment Ink
- Glue both the die cut image and sentiment banner into place


A big Thank you Altenew for sending the bundle and inviting me to create with it!
Thanks for taking time to stop by. Hope you are inspired to create something you LOVE!
LauraJane:)
****I am part of Altenew's affiliate program. Which means I earn a small commission at no additional cost to you every time you click through and purchase product(s) linked in this post. Thank you for your support!

or $5 OFF international shipping with code : SHIP7OFF at checkout.
Current Altenew Promotions Page: find all the current deals and promotions at Altenew in one place!